Alone In The Dark 3
| a game by | Infogrames Entertainment |
| Platform: | PC (1994) |
| User Rating: | 10.0/10 - 2 votes |
| Rate this game: | |
| Updated: | Aug 27, 2020 |
| See also: | Horror Games, Old School Games, Cult Classic Games, Alone in the Dark Games |

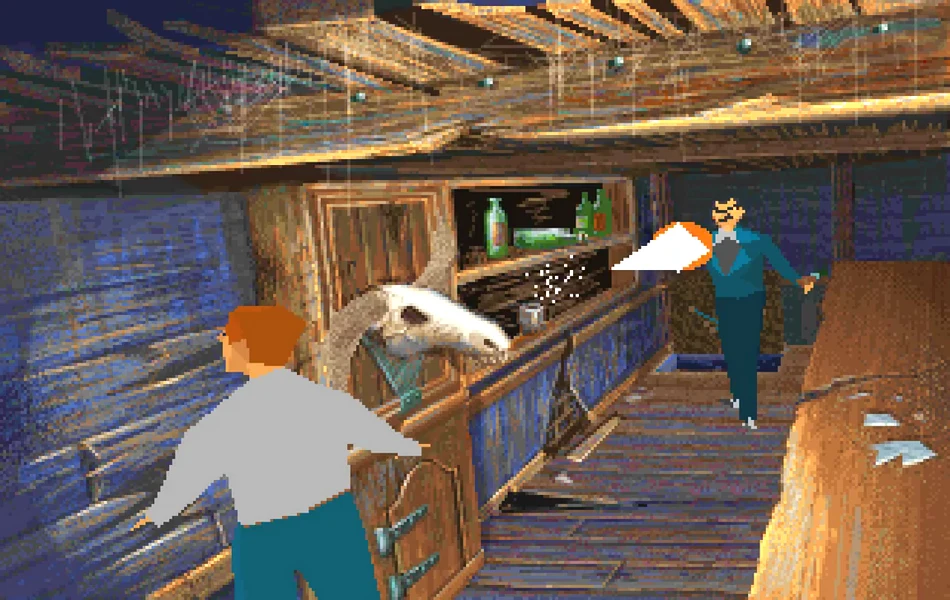
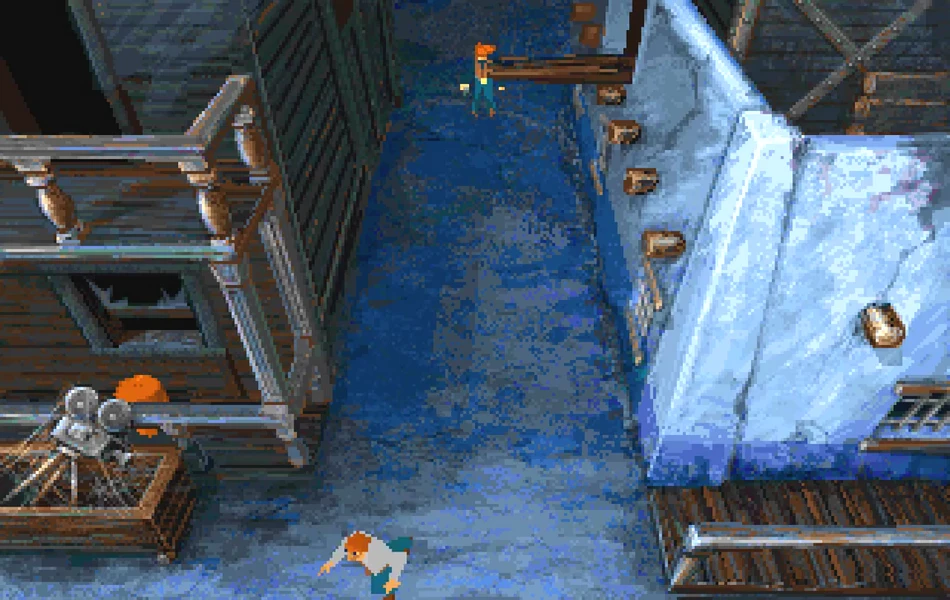
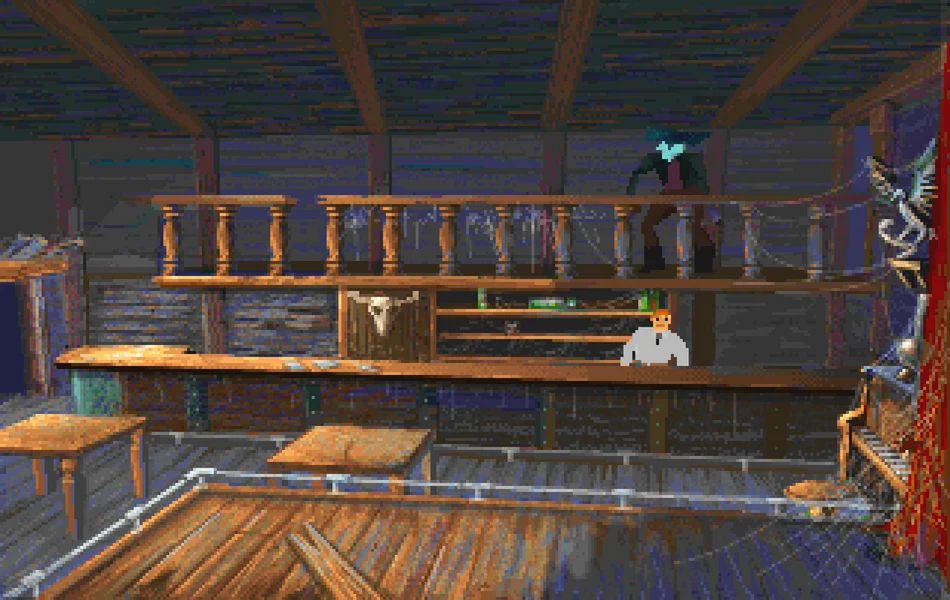
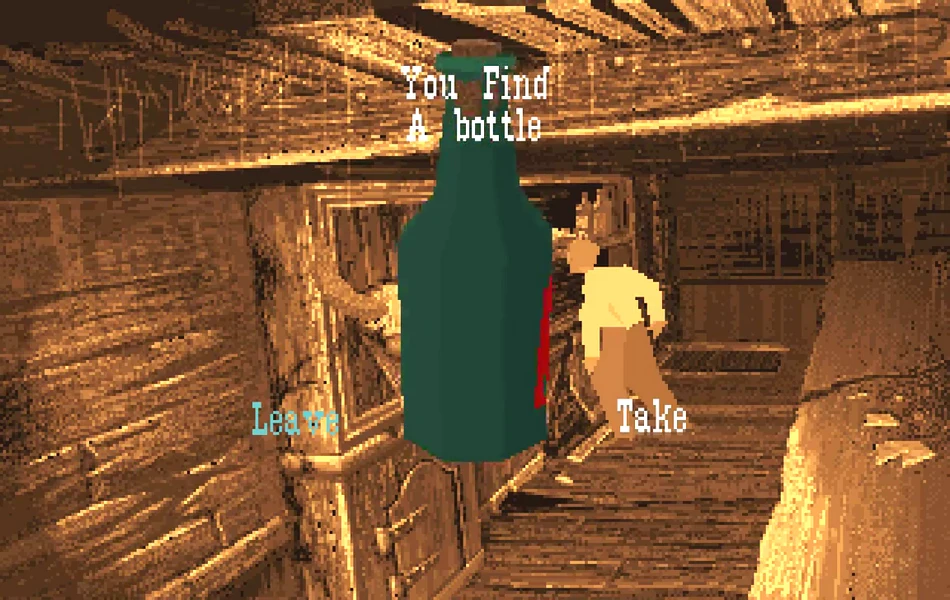
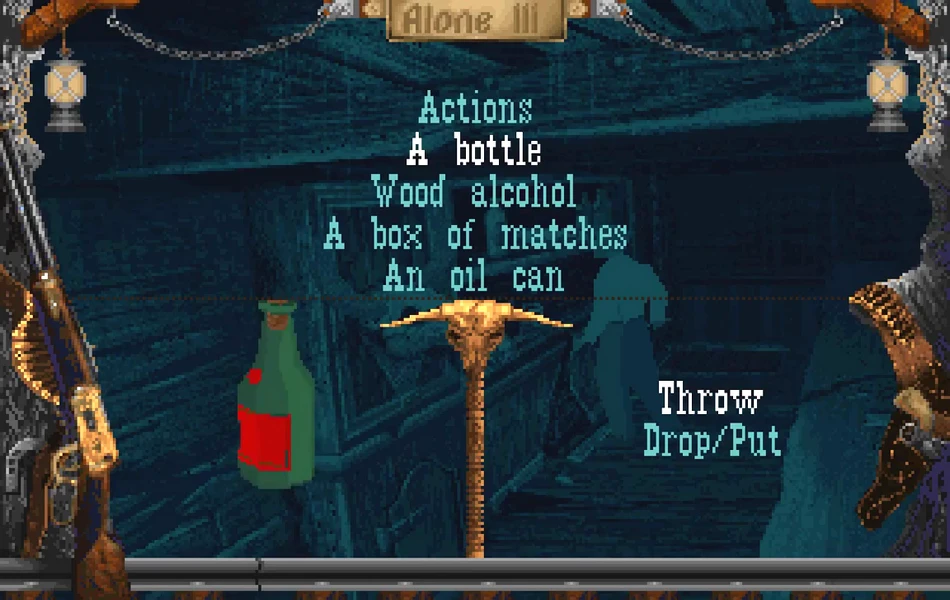
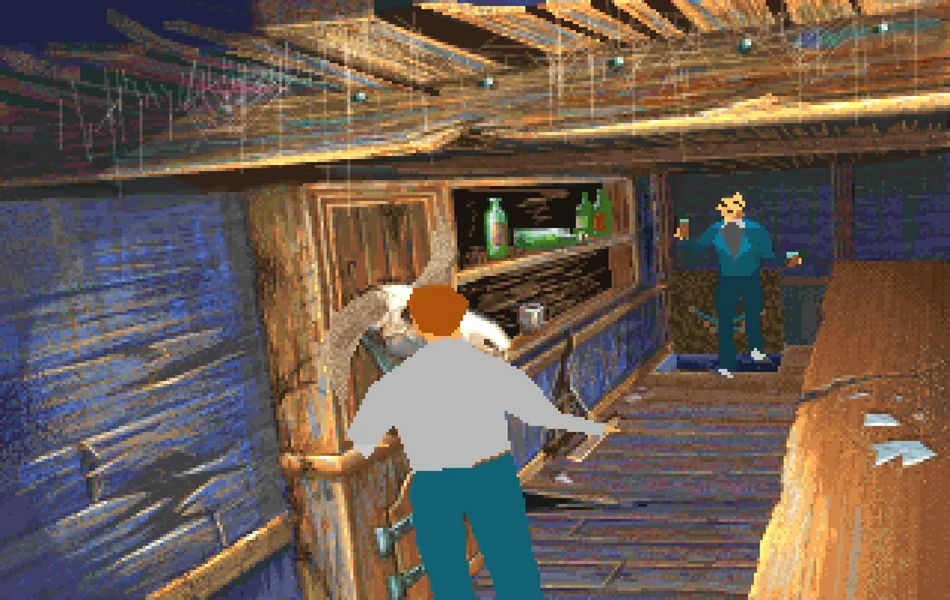
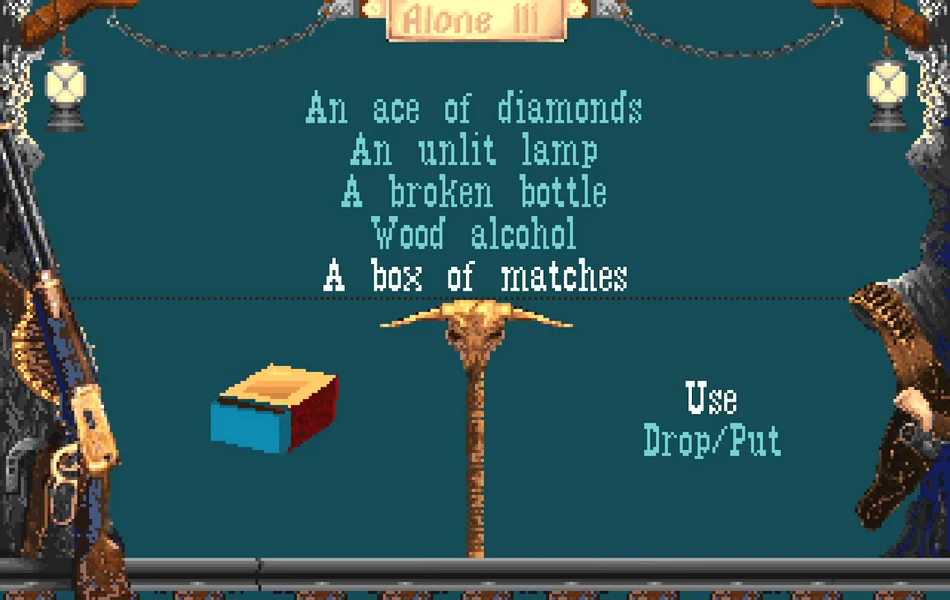
First cross the bridge. Then take the gas can that is near the swing doors. SALOON Enter the Saloon. Use the gas can on the generating set to see a clip of "The Last Ranger". Take the oil can from the corner, the maraca from the stage, the key from the table and the box of matches from the store area near the bar. Dodge the bullets from the bad guy from upstairs, then search the shelves for the wood alcohol, a bottle, and a flask. Go to the animal skull, and push down the left horn. The trap door will open and a bad guy will come up with two guns. If you stay behind the skull, you may be protected from most of the bullets. Once he's out of bullets, he should be easier to get rid of. He leaves an ace of diamonds and a gold bullet. Go down the trap door and get the lamp.
Cellar
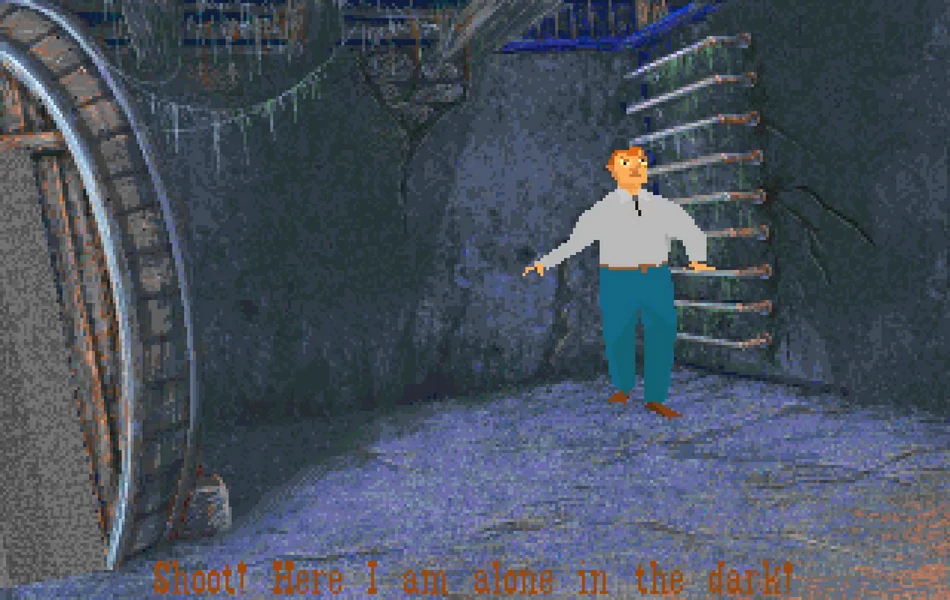
The screen is blank, which means that you're in the dark. Use oil can to fill lamp, use matches and then use lit lamp. Go to the other end of the room. Get the cane, search the poster for a note from "Lefty". Go to the door of the nearest barrel (nearest to poster). Open the door. Step away from the door and use the maraca to lure the red snakes out of the barrel. Go to the end of the barrel. You may want to save here before you climb up.
Ground Floor Jail
Quickly get the stone from the bench, and go to the cell door. Use the cane to get the keys, and use them to get out of the cell. If you kill the bad guy, he just reappears a little later, so you have to hurry. Throw the stone to turn it into an Indian amulet that you'll need. Go to the other end of the corridor, and enter the room. Drop the wood alcohol to get rid of "Lefty", take the flask that's left behind. The Indian amulet will protect you from the pentagram on the floor. Go to the room to the right -the Sheriffs office. From the desk get the Sheriffs badge and bullets for a Winchester. Search the posters for information. Use the key you got from the Saloon to unlock the gun case and grab the Winchester. There's not much in the room opposite, except the bad guy in the fireplace. Open the grille if you want to fight him. If you use the Winchester to fight the bad guy, don't worry if you run out of bullets. Go down the side corridor to the front of the jail. Push the closet in front of the doors to stop a bad guy from breaking them down and to reveal a rope ladder. Search the closet for a shotgun.
Jail Roof
Get the whip. Go to the hovering block, and time it to avoid the red beam. Get the voodoo hangman's rope. Go round and get the cast iron plate - use it to protect against being shot. Get the cartridge belt (for the Gatling gun). Use the gold bullet, and it will be put into the Winchester, replacing any bullets. Shoot Burris with the gold bullet, and get the bag of scorpions. From the other area get the Gatling gun, flask and short fuse from beside the barrel.
The Hangman - go back to where the cast iron plate was. Shoot the door, and you can now open it. Once inside, light the lamp. Use the voodoo hangman's rope to help you breathe more easily. Drop the bag of scorpions down the trapdoor. Push the lever to close the trapdoor, allowing you to search the corner to get dynamite and a piece of dried meat.
Hole in the wall - go back towards where the barrel is, after killing the two bad guys. Once you are near the barrel, the door will close and someone will try to shoot you through the door. Use short fuse to complete the dynamite stick, and use it by the largest crack in the wall nearest the barrel. Use the matches to light it, and then take cover! Go through the hole. Through the hole - step on the arrow symbol to open the passageway, otherwise you would have to fight a guy with a knife. Go around until you meet another bad guy, ignore the broken wall for now. After you get rid of the bad guy, go to the mechanism. Use sheriffs badge to fix it, then use whip to pull the lever above, opening the door. Go through and get the flask and the bullets on the plank. Run to the end of the plank and you should end up on the first floor of the saloon, rather than meeting the Elwood brothers.
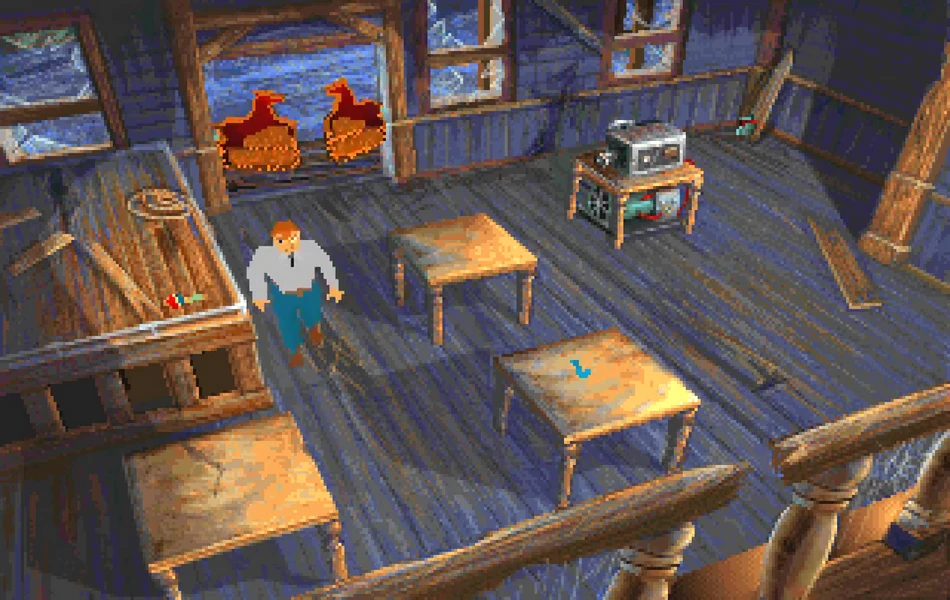
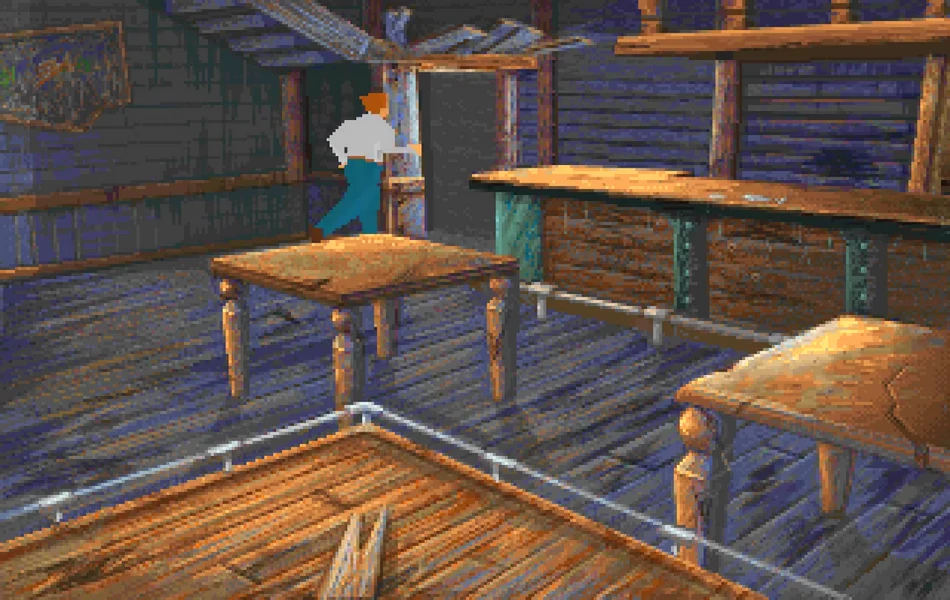
Saloon First Floor
On the Landing, light the two lamps nearest the broken window. One will open a door, another will give you a message. Go back and through the now open door. When the vulture squawks and the ghost of the Arizona Kid appears, use the piece of dried meat at the clock. You should be given a token. You will need the night valet. There is a flask in the corner by the painting. Go through the painting.
Large bedroom - search the table with the mirror for a 30/30 bullet, a bulb and a pearl. Push the mirror for a key. Search the foot of the bed for an arrow, which you can use on the cupid figure on the bedpost. Go back through the painting and back to the landing. Get the costume jewellery ring near the hole in the floor, use it to separate the ring from the diamond. Use the key from the mirror to open the door nearest the hole in the floor.
Small bedroom - get the diary, instruction sheet and flask from the floor. Bump into the dragon figure on the stand beside the bed to get close-up view. Use the diamond from the costume jewellery to get some more Winchester bullets. Go out the opening to the ledge.
On the ledge - go to the open window shutter and put the night valet in front of it. You may have to reposition it (and get shot at) before the bad guy comes out and falls to his demise. Photo room - near the table is a shutter release, instruction sheet, flash and on the table is a key. You can look at the photos on the wall. Leave via the window you came through, back through small bedroom to the landing. Use the key from the photo room to unlock the last door by the broken window. You can use bulb and shutter release before entering the next room.
Piano room - when the flash is ready, use it at the reel of the film (the round thing) on the floor, to get rid of the two-headed bad guy. Get the oil can from beside the piano, use the token at the end of the piano for some music, shoot the target to open it. Search inside for a flask and war stick, then the block should move to reveal a hole in the floor.
Meet A Native American
In the cave, use oil can, matches and the lit lamp again. Exit into another cave. You need to save after each jump. Walk onto the first block, jump the other blocks until you reach the shaman. Use war stick and he will walk back to let you pass. In the centre of the platform is a box of cartridges and a small key. Step onto the next block, jump on the other blocks until you reach the block with a symbol on it. You then jump to the block on the right of the screen, then back to the block with the symbol. (Jumping to the block to the right first makes a block further back rise up.) Keep on jumping until you reach a block that hasn't risen up, and you can't go further. Use the Indian amulet and you will be helped across.
Mansion Ground Floor
Kill the two bad guys. The first leaves a flask, the second a top hat and a key. The cask of silver salts is used later. Go to the doors at the other end of the room, which the most recent key should open.
Library - search the shelves for books: a white book (blank), a book (watchmaker's manual), and a locked book (a book on Navajo traditions - which will open with the small key from the Indian). The bust at the end of the room has a pocket watch. The table has a printing plate that you can use in front of the mirror to read it. Go to doors beside the cask of silver salts.
Study - use the pocket watch to unlock the doors. Enter the room to meet Morrison. Go up to him to receive a storyboard, then he will leave. Use the top hat on the bust of Abraham Lincoln to get some cartridges. A bad guy appears to pull back the curtains on a stained glass window, while another appears and attacks poor Morrison. After killing the zombie, be a vandal and shoot the window. Go up the steps and out the window.
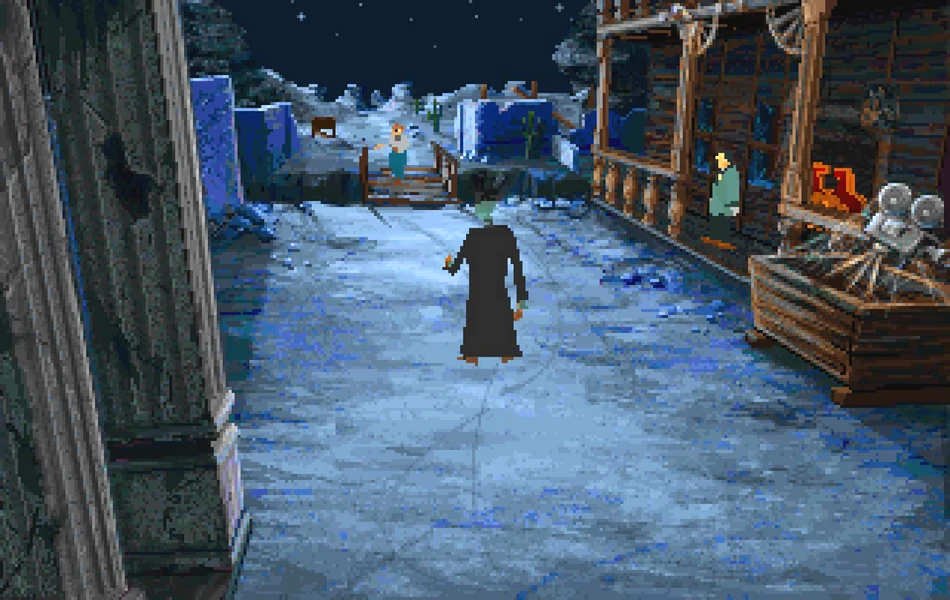
Graveyard
Use the war stick at the round stone thing in the centre, otherwise you'll meet two nasty gravediggers. There is a vault in the far corner, but it is too low for you to enter. So go to the grave marked O. E. J. (One Eyed Jack) and use the Ace of Diamonds on the right hand side of the grave. Get the message and be lifted up to a kitchen.
Kitchen - there is an oil can on the table, roll of film on the floor, a bag of pemmican on the strange looking sideboard. Use oil can at the mechanism in the fireplace to reveal another room. Dance room - search the lady figure for cartridges, the male figure for a hammer. You will be shot at by the guy by the stage, who will follow you. Try to avoid being hit by other of the musicians on the stage as you go to the gramophone player. There you will find a guitar string, musical score, key to a safe. Go back to the kitchen and behind the sideboard, through the door to the next area. Use 30/30 bullet and hammer to get through.
Dressing room - search the dressing table near the model of a station for blasting cap, map and light bulb. Go to the next area to the mounting table. Use the guitar string, light bulb, then the roll of film. Also use the musical score at the mounting table for a number combination: 806.
Bank - get the astronomy book from the table, and search the picture at the end of the room. Keep on searching until the combination is 806, then you can go behind the counter. Go up to the large safe, use pearl, then the key to a safe. Kill the bad guy for the amulet and then you can get the suitcase with some cartridges and Hill Century's money. The money is booby-trapped so don't bother trying to open it. Open the window to get to the next part.
Meet Evil McCarthy
Get the message McCarthy has from Jed Stone by walking up to him. Get flask from the saddle in the corner. Search the mine cart for detonator box and cartridges, and i ride past some bad guys. When the mine cart stops, enter the nearest open doors.
Station
Quickly go and push the large "Station" sign. The blue bucket of paint will spoil it and the station master in the rafters will cry (otherwise he will whistle for some bad guys to come). Get the key, search the rails by the sign for an eye-bolt. Go to the corner by the door, and use the eye-bolt to ring th( bell about three times. The door rises once slowly, then three times quickly, so you have to time it carefully or get killed.
Outside - quickly put the blasting cap beside the fence and use the detonator box and you'll finish off the story-board scene. Go to the water tank opposite the station.
Water Tank
Put the suitcase and key for the suitcase in front of the water tank. Get Swiss-cheesed by the Elwood brothers. RIP Edward Carnby.
Reincarnation
Ignore the craving for cat food, as you only have about too seconds to complete your task. Quickly leave the vault, and go to the saloon. Go up the broken stairs and onto the first floor. Jump the hole, and run towards the broken window. On the jail roof, run to the large gap in the wall, the one that you can see the statue through. Run to the edge and you should jump onto the statue. Go to between where you saw McCarthy and the bank, and search the barrel of tar to get a sticky paw. Next, go to the front hall of the building where the cask of silver salts is. Search the cask to coat your claw with silver, before heading back towards the area between saloon and graveyard. Kill the werewolf, enter graveyard and kill the second werewolf. Go back to the vault and drop the eagle nugget at the fire.
Back To Life
Now you are no longer dead, but you were certainly buried! Get the Colt 45 left by the one-armed man and a bar of soap from behind the grave. Now make your way back to the water tank again.
Return To Watering Tank
Drop the Colt near to your double because you are "against violence", then walk up to your double. Don't bother to try and attack your double as you will probably injure yourself. Once you have your cowboy hat on, you can pick up the Colt. Climb the ladder, then go down to see what is inside the water tank. In water tank - use the soap and the bad guy won't wash but will go. Get the metallic brush he leaves and the flask near | the water tank wall. Use the brush in the large peg with the hole to open up a trap : door. Down you go...
Underground
Go along the passage to the next area. Get . the dead leaf and put it in the Indian bust. You can look at the map on the wall and get the notebook in the corner. Climb the rungs.
Sleeping quarters - quickly take the pick axe from the bed and use it to kill the bad guys (a second one will appear after the first one has died). A flask is at a bed at the far end of the room.
Spike pit - there are some sheets of paper in the corner. Squares will appear when you walk over the correct places over the pit, follow the path on the map. It is important to save your game here!!
The route across - if you divide the width of the pit into four equal parts, the first square starts at the second quarter from the wall furthest the entrance/closest to the sheets of paper. Then go one square forward (towards other end of the pit/to the left of the screen), one square towards the near wall. Two squares forward, then one towards the far wall (top of screen). Repeat going one square forward and one square towards far wall until you are on a square that reaches the other end of the pit. Kill the bad guy with the pick axe and go through to the next room.
Library - kill the bad guy, then you can get the scorched book, candlestick, water pitcher and needle. The door opens when the candlestick is removed. Go down the passage to the next area. To the lift - go up to the rifle man and use the water pitcher to give him a drink, and the doors can now open. Take the piggy bank and throw it to receive a glass microscope plate. Now push the lever to go up.
The Lab
Out of the lift, go to the far end of the room and use microscope glass plate at the microscope. The colour-coded switches should be pushed in the following order to open the door - grey, green, blue, red.
Take the bottle of poison from the table beside the tank with green liquid, and go to the cell. Use the poison to poison the needle, then go to the table near the cell. Once you find the distilling coil, use poison and get a shrinking feeling. Go into the jail cell and get back to normal size.
Sadly, the doctor doesn't like you, so you have to kill him with the poisoned needle. When he is gone, you can get the piece of straw and key to the gaol he leaves behind, and the bottle of ammonia. Use the poison at the distilling coil again, but this time go through the small hole in the wall below the table. Use the straw to pole vault across the gap, and get the vial of potion on the other side. Go through before the poison shrinking effect wears off.
Spider Guy
Quickly go to the other side of the room where something is leaking through a crack in the wall. Use the vial of potion to spike the spider guy's drink and get out of its way. Once his threat is reduced, you can go ahead and squash him. Get the pot of glue, but avoid getting too close to the big sticky web. You can see what is going on in the next room by opening the eye shape, but you get shot at by Jed Stone if you do. Use the pot of glue to get sticky hands, then climb where the shaft of light is. You should save here.
More Bad Guys
The headless body of the bad guy (Hammer) may be rather quick, so you have to rush around a few times before you manage to get Hammer's head. Then you may have to run around before you actually get the chance to throw his head down the hole you came up. Alternatively, you may be able to push the anvil so that it blocks Hammer's body, so that you can get his head in safety. When Hammer is gone, get the lead ingot from the anvil, a flask and a Winchester.
Cobra - it may be easier to kill Cobra using the Winchester. When he goes, he leaves his wig and a silver dollar. There is a flask in the corner. Search the poster and you will notice a slot there. Use the silver dollar there. Go down and get the box of matches before going to the next room.
Freeing Emily
Jed Stone runs off when he sees you, the coward. To free Emily go to the crucible, but avoid stepping over the skull pattern or radioactive rock at the top of the skull shape. Use the lead ingot and matches at the crucible to neutralise the threat. The lead is now an evil wand with a mineral tip. Get it and the ammunition in the corner. You can also get a scorched paper and parchment. Save before the next part.
More Spikes
Go through the doorway. When you can next move, step back from the door and throw the bottle of ammonia at the door, this should wake Emily. When the bad guy is disposed of, he leaves a knife that you will need later. Go to the door that had the spikes and use Cobra's, wig to pull the switch above. You may need the flask and should save the game before opening the door.
Final Showdown
Quickly run to the large eagle totem and use the evil wand at the front of it, and no more Elwood brothers. Jed Stone in the suit of armour won't follow you in the totem area. A game save here is advised.
Go to the tap by the ditch in the floor and open it, getting the ditch filled with some water. Then, get the rubber glove from the corner and use it and the knife to cut the cables near the machinery. Once you have done that, go back into the totem area and wait for Jed to put his foot in it.
The End
When Emily has opened the door, get the sack of coal near the totem area and go through the door. Climb onto the train and use the coal and matches before pushing the lever to start the ending. Hope you enjoyed your visit to Slaughter Gulch! All that is left for you to do is to sit back, listen to the music and watch the credits.
Download Alone In The Dark 3
System requirements:
- PC compatible
- Operating systems: Windows 10/Windows 8/Windows 7/2000/Vista/WinXP
Game Reviews
Alone in the Dark Was, without a shadow of a doubt, a truly remarkable game. During a time when the games market had become a little staid, Infogrames and its industrious French development team came up with a new kind of adventure game that mixed traditional ideas with some spectacular 30-polygon graphics. After proving to be a monster success, the inevitable happened... we got a sequel, and although it was bigger than the original, it lost a bit of its charm due to the more action-oriented nature of its gameplay.
Now the series is drawing to a close and Infogrames is putting the finishing touches to the final part - an absolutely epic cd-specific title that brings the tale of Edward Carnby supernatural detective to a close.
The new tale tells of a woman by the name of Emily Hartwood, a young antiques dealer, who has moved to Hollywood to fulfil her dream: to work in the movies. After harassing every studio in town, she finally finds a job at the Hill Century Studio as a script writer. At the beginning of the summer of 1925 Emily finds herself on the shooting of a film called The Lost Ranger, which is set in a tiny ghost town called Slaughter Gulch (subtle name huh? Bet nothing weird ever happens there eh?), deep in the Mojave Desert. On the night ofJune 3rd, one of the horses hired by Hill Century is found five miles away from Slaughter Gulch, crazed with terror and trembling with exhaustion. Scrawled in Emilys handwriting on the saddle are just two words: Call Carnby.
The plot thickens
Ooh... scary stuff or what? As the game begins, Carnby arrives at Slaughter Gulch and is immediately plunged into a typically Alone-y-ghosty-ghosty-type situation. Take, for example, the first character that you meet: a John Wayne-esque, swaggering cowboy-type chap who doesnt have any skin. (Hmm, very nice.) From this point on things get progressively weirder as you find out that 50 years ago the area on which the town was built was stolen from Navajo Indians who used the area as some kind of sacred burial ground thingy... The result is that, the chappy responsible, Jedediah Stone, is now one of those undead-type people (something to do with the spirits and the land or some other such weirdness... its a French game remember?) and it is he who is holding Emily hostage. Your job, as ever, is to be the hunky hero and dive on in there to rescue the fair maiden and save the day.
Its all the same to me...
Now then, as far as overall gameplay goes, this isnt really that much different from the previous games. Obviously, apart from the new cowboy/spooky-spooky plot, there are enhancements to the way in which the game plays, and on top of this there is now a new bit of weirdness to sink your teeth in to... The first game brought us Lovecraft-in-spired occultism, the second demonstrated distinct voodoo tendencies, and now we have alchemy to deal with. But hang on, isnt alchemy all about turning bits of crap into gold? Well, er... yes, it is actually. Im not quite sure what the crack is here because whereas all previous spookiness has been based on the occult, alchemy is nothing more than the (ahem) pseudoscientific predecessor to chemistry (Im dead clever me. look at that... that first word had six syllables.) Anyway, confused French scripting aside, its safe to say that there is much supernatural weirdness to be dealt with and all kinds of Indian spiritual kind of stuff cropping up from time to time as well. Anyone whos seen the first Poltergeist movie will have an idea of the sort of thing ! mean, you know, spirits, demons, the undead rising from the grave. Nothing particularly out of the ordinary.
I wont spoil things too much about the plot - but I feel that it is necessary to mention that Carnby actually pops his clogs in Alone 3. (Whoops, there. Ive said it. He dies, kaput, dead, doomed, meat.) The thing is, though, for some bizarre reason he conies back to life as a cougar and you have to finish the game as an animal rather than a human. Bizarre.
...Well, some bits are new
As far as new technical achievements of the game go, there is a fair bit for the development team to be proud of. For a start, we have no less than 270 different backgrounds to go cor, that looks neat at, there are more than 60 different characters to interact with (and most of them talk, too), theres a full digital sound track and full speech throughout, and the animation system employed is vastly improved.
Were assured by Infogrames UK office that there are scenes which run at approximately 94 frames per second, so we can assume that the thing is going to look extremely smooth. Incidentally, its worth noting that the recommended spec for the game is still a 386DX-33 with 4MB ram. This is quite a surprise really; for once, a developer seems to be optimising for lower spec machines rather than pitching the new products at just 486DX2 and Pentium owners. An admirable thing to do, Im sure youll agree.
Parlez-vous Anglais?
As we go to press Alone In the Dark 3 is actually finished, surprisingly enough. The only problem is that the whole thing is still in French - all of the text i.e. everything you can read, and most importantly, all of the speech. There are, apparently, thousands of lines of spoken word in the project and due to the differences in language structure between English and French, a number of changes need to be made to the basic structure of the game. Obviously, the rerecording of all the spoken passages is going to take some time, but apparently, the way it slots in with the gameplay also needs to be changed.
As long as all goes according to plan, this process shouldnt take longer than about a month, and we should be seeing the game in the shops in time for Christmas.
The project is a CD-only game and there are no plans for a floppy version at present.
Snapshots and Media
PC Screenshots
 Ao Oni
 Blair Witch Volume I: Rustin Parr
 Blair Witch: Volume II - La légende de Coffin Rock
 Carrier: The Next Mutation
 Condemned: Criminal Origins
 Sanitarium
 The Devil Inside
 The House of The Dead
 The Legacy: Realm of Terror
 The Quivering
 The Coffin of Andy and Leyley
 The Price Of Flesh
 Blood Trail
 Changed
 Evil Nun: The Broken Mask
 Fears to Fathom - Ironbark Lookout
 Sad Satan
 Parasocial
 The House of The Dead: Scarlet Dawn
 Resident Evil 4 - Separate Ways
 Resident Evil Code: Veronica
 Propnight